HAPPY FRIDAY! Even though I work from home and I work most weekends, I do still get excited about Fridays. Something about the weekend just feels different.
In yesterday's post I talked about how we came to the decision to have butcher block countertops.
(Read about it here) Today I am going to tell you how we did it.
This is a really long post but if you are considering doing butcher block countertops yourself, it is worth the time.
STEP 1:
Decide on which butcher block you want. At
Lumber Liquidators there are four choices in wood type: American Walnut (a little more expensive), American Cherry, Maple, and White Oak. You can stain any of these to achieve the color you want. I wanted something with natural tones so I went with the American Walnut. It has natural variation in color and has a warm brown tone without stain that goes well with the rest of our home. IKEA also has butcher block for purchase but they do not have as many options in types and the longest section they sell is 8 feet.
STEP 2:
Measure to calculate how much to order. Think about how you are going to connect the different pieces. If you do a 90 degree connection your lengths might be different than if you do a 45 degree connection.
90 Degree Connection - 2 rectangular pieces put together
45 Degree Connection
Blittle and I both thought the 45 degrees looked more professional and resembled a "normal" countertop the most. For our kitchen, we ordered one 12 foot section and two 8 foot sections. These are not carried in stock at
Lumber Liquidators so you have to order online or call/visit the store to order. They were delivered in a week or two so keep that in mind when you are scheduling. We picked ours up from the store instead of paying for delivery to the house. They are HEAVY but we moved them on our own so this can be a two person job but a third person would be helpful for extra muscle.
When you open the box and see that it looks rough and there are scratches DON'T FREAK OUT. There is an obvious right side (top of countertop) and wrong side (bottom of countertop). The bottom is not sanded at all! Here is what our bottom looked when we opened the box.
You can see some scratches and that it is not very smooth.
Here is the top side.
Definitely smooth!
SIDE NOTE:
Let's talk about prep and protection. Usually butcher block is wiped down or coated with food friendly Tung oil or other food safe oil. When you use butcher block as a countertop that will be exposed to more water (around a sink and dishwasher) and heat (the oven and stove), it needs to be protected differently. There is a company called
Waterlox that makes products just for wood countertops and wood floors.
I followed
these directions I found on the Waterlox website that are specifically for butcher block as a countertop. These products are not cheap but a little goes a long way. For our counters I ordered 1 gallon of the
Sealer/Finish ($70) and 1 quart of the
Original Satin Finish ($36).
ANOTHER SIDE NOTE: This process still keeps the wood food friendly if you want to use your butcher block countertops as a cutting board. We will not be. We have some scrap butcher block from our cuts that we will use as cutting boards.
Ok. Back to the steps.
STEP 3:
I put 3 coats of Sealer/Finish on the bottom side waiting 24 hours between coats. Doing this helps protect the bottom from moisture from the dishwasher and under the sink as well as from heat released by the oven and stove. This will inhance the color immediately.
Bare Wood.
First coat.
STEP 4:
Making cuts. Obviously everyone's are going to be different but I can tell you what we did. Our first cuts were for overall length. Meaning wall to wall or wall to end of the cabinet. We had three large rectangular pieces that fit in place but now we needed to make the 45 degree cuts.
Using a protractor we measured our 45 degree cuts. Protractor? Yes, a huge one. You find them at Lowes or other hardware stores. There are large protractors usually used to measure angles for crown moulding. We measured, measured and re measured our angles. It was absolutely nerve racking making those first cuts but we finally went for it. I recommend a new saw blade for this. Butcher block is thick, heavy and hard on your saw. Go slow and let the blade do the work. Sand your cuts smooth.
Why is there tape in the picture? We put tape on the edges to protect the wood when we were cutting and testing our fit. Not sure if it did anything but it made me feel better.
Put the pieces in place to check for fit. Make any length adjustments now.
STEP 5:
Prep for the fasteners. We used wood fasteners I ordered online and used a router to cut the grooves for them. To be safe we tested our router depth and size. We made a template out of plywood and tested it on scrap butcher block before we worked on the real countertops. We laid the counters on the floor next to each other, upside down, lining them up like they would be when they were installed. We decided to do 3 fasteners at each joint. We traced the template then used the router to make the grooves. (I can't find pictures of this step for some reason. Sorry. I guess I forgot to take some. DUH.)
STEP 6:
Now install and fasten. Put your counters in place on the cabinets. You might have to do something adjustments but things should fit well. Be sure to look at the corners lining up and check to see if they are level. Ours were pretty easy and we did not have to do much adjusting.
SIDE NOTE:
We had to install our sink BEFORE we could install the counters. Due to the sink's size and location and our cabinet size and plumbing, our under mount sink could not be installed after the counters. If you have a drop in this should not be a problem, but if you have an under mount please keep this in mind. I'll post sink info later but here are some pictures of prepping for the sink.
Here are the fasteners under the counter installed and tightened.
STEP 7:
Filling cracks and evening out joints. Since we had walnut counter tops I bought walnut filler and I mixed it with some saw dust that I saved (there will be plenty! just put it in a ziploc until you are ready to use it). This causes the seam to have color variation just like the rest of the counter and not just a single colored seam. After it is filled, sand smooth.
Seam before its filled
Seam after its filled.
STEP 8:
Sealing with Waterlox. If you would like to stain your countertops, do it BEFORE Waterlox. I chose not to but it is an option. Apply the stain like you would to any surface. Wait at least 8 hours for it to dry then apply your coats of sealer. I used a
Wooster stain brush to apply the coats. Be sure to clean it well after each use. I put 4 coats of the sealer/finish (5 around the sink and faucet) and 3 coats of the Satin finish. Yes, I waited 24 hours after each coat and yes, I sanded between each with 400 grit paper. I do recommend waiting the 7 days after your final coat for heavy usage. Although the countertop will be dry, it is not be fully cured and can not handle everyday use yet. BE PATIENT.
STEP 9:
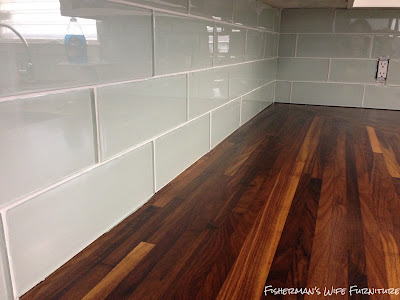
ENJOY! It was a lot of work but we used less than half our countertop budget and we able to put that money towards other things that needed to be done in the house. I am extremely happy with the butcher block even though it wasn't my first choice.